The Brain: ESP32 Development Board
The ESP32 Development Board is the brain of your project. It's a powerful, low-cost microcontroller with built-in Wi-Fi and Bluetooth, making it perfect for robotics and IoT projects. The ESP-WROOM-32 module contains the main chip, and the CP2102 chip allows it to connect to a computer for programming.
The Muscles: N20 High Torque Speed Reduction Motor
These N20 High Torque Speed Reduction Motors are your robot's muscles. With a built-in gearbox, they reduce speed while significantly increasing torque, providing the necessary power for movements like driving wheels or operating a robotic arm. The 12V 200RPM rating indicates their operating voltage and speed.
The Nerves: Motor Drivers
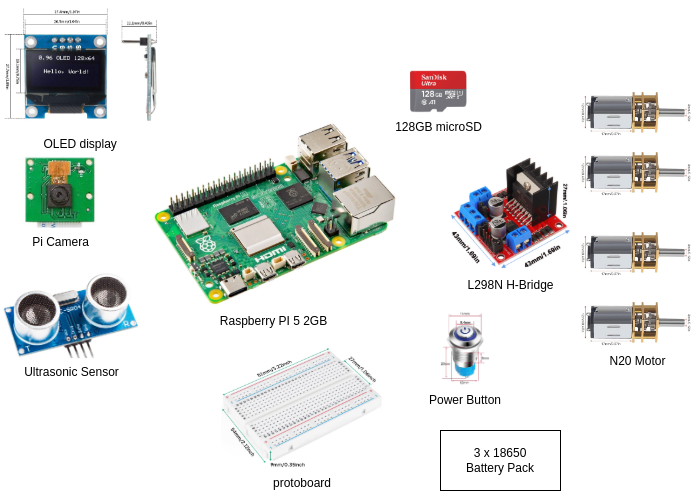
Motor drivers act as the nervous system, translating the brain's (ESP32) low-power signals into high-power commands for the muscles (motors). Both the L298N and the more efficient DRV8833 are dual H-bridge drivers, allowing you to control the speed and direction of two motors.
The Heart: Power Sources
The heart of any robot is its power source. 18650 Li-ion rechargeable batteries are high-capacity cells that provide a steady supply of energy. A portable battery pack is a convenient, all-in-one unit that can be charged via USB and used to power the entire system, making your robot portable.
The Skeleton & Veins: Breadboards & Jumper Wires
The Elegoo Mini Breadboard is your robot's temporary skeleton, providing a structure to quickly connect components without soldering. Jumper Wires are the veins, carrying power and data signals between the different parts of the robot.
The Indicators: LEDs & Resistors
LEDs are the robot's lights, used for status indicators, signaling, or even adding a personal touch. Resistors (like the 220 Ohm and 330 Ohm varieties) are crucial for protecting the LEDs and other components by limiting the flow of electrical current.
The Senses: Photoresistor & Ultrasonic Sensor
These are the robot's core senses. A Photoresistor detects light levels, allowing the robot to "see" how bright its environment is. The Ultrasonic Distance Sensor (HC-SR04) acts as a form of sonar, measuring the time it takes for a sound wave to bounce back to determine the distance to an object.
The Face: OLED Display
The OLED Display is its face, a small screen that can display text, graphics, and data, allowing for richer communication between the robot and its user.
The Controls: Push Button & Wireless Keyboard
These are your primary interfaces for controlling the robot. A simple Push Button can be used to start a routine or change a mode. A Wireless Keyboard offers more complex control, allowing you to type commands and interact with the robot's system directly.
The Manipulator & Vision: Robotic Arm & Camera
A Robotic Arm Kit gives the robot the ability to interact with its physical world, with SG90/MG90S servos acting as its joints. A Camera Module provides a dedicated vision system, allowing the robot to see its surroundings, capture images, or stream video.
The Supercomputer Brain: Raspberry Pi
For projects requiring advanced computing, such as machine learning or complex AI, a Raspberry Pi is the ultimate brain upgrade. This single-board computer runs a full operating system. It requires a MicroSD Card for its OS and power (a power supply is included).
The Garage: Storage & Organization
Keeping your components organized is essential. IRIS USA Storage Bins provide a durable and stackable solution for storing larger parts and project materials, while Tire Molds and other small containers are perfect for sorting smaller components.
The Anatomy: How It All Connects
The ESP32 (brain) receives input from sensors (eyes) and controls the motors (muscles) through the motor drivers (nerves). All of these components are connected on a breadboard with jumper wires. Power is supplied by the batteries (heart), and the robot communicates its status using LEDs and the OLED display.